Better Plasmid Purification: 11 Reasons Your Plasmid Yield is Low

Listen to one of our scientific editorial team members read this article.
Click here to access more audio articles or subscribe.
When performing plasmid preps, getting good plasmid yields is vital. So what is a good yield? How do you optimize your prep to get a good plasmid yield, and what is it that causes low yields? We cover these questions and more below.
What is a Good Yield for Plasmid Preps?
There are three main types of plasmid preps: mini, midi and maxi. The amount of plasmid DNA varies between protocols and kits, but Table 1 provides an average range for these three different prep methods.
Table 1. Average yields for plasmid preps.
Prep type | Plasmid DNA recovered (μg) |
Mini prep | 5–50 |
Midi prep | 50–200 |
Maxi prep | 200–1000 |
What Causes Low Plasmid Yields?
We received a question from Bitesize Bio reader Sonia asking: “What could be the problem when one sample gives a good yield while the other plasmid gives poor a one, when both the samples were processed simultaneously, and in the same way.”
This is a good question because many things can cause differences in yields between plasmid preps. Let’s resolve this mystery one point at a time and go over some reasons why you might get low yields when you prep plasmids and what you can do about it.
1. Problematic Inserts
You prepped two plasmids simultaneously using the exact same protocol and had different yields. If the plasmids have the same backbone (that is, they are both pUC, or pBluescript, etc.) then the reason leans towards the insert playing a role.
Some inserts can be problematic for bacteria. It might be that a protein is made that makes the bacteria sick (for example, DNase) or it could be that the insert is unstable (for example, repetitive sequences).
To overcome the problem, try using a specialized competent cell line. For unstable inserts, try the STBL2 cells from Life Technologies, and for growing clones with toxic proteins, try the T7 Express LysY/Iq Competent cells from NEB.
Another important point is how the insert size changes the copy number of the plasmid. Large inserts will reduce the number of copies of the plasmid, meaning you may need to grow more cells to get a decent yield.
2. Copy Number
If the genes are cloned into different vectors then the issue could be that the plasmids are replicating at different rates. One may be a high-copy plasmid, and another may be a medium or even low-copy plasmid.
Some examples of low-copy plasmids are those using the backbone pBR322 and pACYC, which are older and not used often in cloning work today. Many vectors used for protein expression are medium copy. This is desirable because when producing proteins, sometimes, if growth is too fast, it enhances the chance of the protein becoming insoluble or forming inclusion bodies.
3. Culture Oversaturation
You will always get the best results by taking care in preparing the culture. Inoculating from old colonies or allowing the culture to become too saturated will result in poor plasmid replication and retention, which could severely affect the plasmid yield.
Growing cultures overnight may seem time-efficient, but overnight cultures can easily become oversaturated and lead to low yields. You want your cultures to be in the late lag phase and not over-saturated.
An alternative solution to overnight cultures is provided below.
Easy Protocol for Growing Unsaturated Cultures
This is for midipreps but can be adjusted for other prep types.
- Start with a fresh colony, no more than a few days old.
- Innoculate a 5 mL LB starter culture with the colony in the morning and grow until the OD600 is approximately 1, then store in the fridge overnight.
- If you are using ampicillin as the selection vector, pellet the cells and resuspend in fresh, antibiotic-free medium to remove the secreted beta-lactamase.
- Next morning innoculate a 100 mL LB culture with 1 mL from the starter culture for high copy number plasmids, double the volumes for low copy plasmids.
- Grow the culture until OD600 is around 3, then pellet the cells and proceed directly to the miniprep, or freeze the cells at -20°C and continue at a later time.
If you do want to or need to grow your cultures overnight, try using a 1:1000 dilution of starter culture into a large-scale culture (so 100 μl into 100 ml).
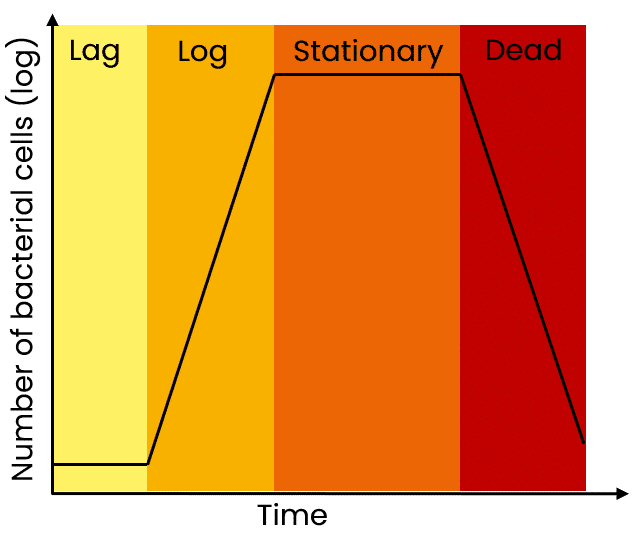
As a reminder, the state of the culture is critical for high yields of a plasmid. For maximal yields, the culture should be in the late log or early stationary phase. If the culture overgrows, you will be harvesting more dead bacteria than live cells and this also leads to genomic DNA contamination in the prep. If the culture is undergrown, then, of course, yields are lower than expected.
4. Undergrowing Cultures
While oversaturation is a problem, the undergrowth of cultures is also problematic for plasmid yields. You can mistakenly undergrow a culture by using old colonies from plates or starting directly from frozen stock and not from a colony. The lag time for the bacteria to ramp up is much longer when you use either of these approaches.
5. Using Old Colonies
One more point that people forget when setting up their starter cultures or overnight cultures is the age of the plate you are using to pick your colony. If your plate is old, you may have picked a nice big colony but it will not be all living cells. And if there were satellite colonies sitting around the original colony where the antibiotic no longer exists, those will not have plasmid and will be introduced into your culture. So streak a fresh plate before starting to ensure the best result.
6. Antibiotic Issues
One important consideration when diagnosing poor plasmid yields is the antibiotic. The bacteria are going to break down the antibiotic while they are growing in the culture.
If not enough antibiotic is added or if the stock is old and not at the correct strength, the antibiotic selection pressure may not last very long and you could end up having a culture that was antibiotic-free for most of the culture time.
Plasmid yields will go down without the selective pressure to keep it, as they use energy to replicate.
Chloramphenicol: An Easy Way to Boost Plasmid Yield?
Many commonly used vectors have a relaxed origin of replication, which allows for decoupling general protein synthesis from plasmid replication in E.coli. Adding chloramphenicol stops protein synthesis, but the plasmid will continue replicating. This will result in many more copies of your vector per bacterial genome.
The relaxed origin plasmids that I am talking about have the pMB1 or ColE1 origin of replication. The most common vector backbones with this origin are (in descending order of copies per cell):
- pUC
- pGEM
- pBR
- pACYC – make sure that your derivative is not chloramphenicol-resistant, as this will make adding the antibiotic useless in any concentration.
There are more relaxed origin plasmids as well.
There are two ways of using chloramphenicol for your plasmid amplification.
1. Use Chloramphenicol According to “The Maniatis”
This is a recipe from the classical protocol cookbook by Maniatis et al., aka “The Maniatis.”1
Maniatis recommends growing your culture until saturation, then adding 170 µg/ml of chloramphenicol, and continuing growing the culture for a further 16 hours. You will stop protein synthesis completely in an already dense culture. The cells will stop growing, but the vector will keep amplifying.
2. Use Chloramphenicol According to Begbie
Begbie et al. have explored another, faster, possibility.2 In the previous protocol, growing the culture will take you at least 36 hours.
The alternative is adding a much lower concentration of chloramphenicol, 3 µg/ml, when you inoculate the main culture with your starter one. The sub-inhibitory concentration will slightly slow down your E.coli doubling time, but will not stop it. However, it will increase the copy number of your vector several times.
Irrespective of the way you amplify your vector using chloramphenicol, treat the resulting culture as containing a high copy number vector. First of all, don’t overload the midiprep or maxiprep column with lysate—use the minimum volume of culture according to the protocol. Elute with the maximum volume of buffer and repeat the elution. You can always concentrate the DNA later.
7. Problems With Lysis and Neutralization
Nick has covered alkaline lysis in great detail, and typically these reagents in the midiprep kits are stable and fine. Solution 2 (the one containing NaOH and SDS) can break down over time with exposure to air so if it is old that could be an issue. In general, they work for lysing bacteria for the life of the kit.
The biggest mistake people make in plasmid preps is with the lysis and neutralization steps. The protocols normally emphasize the importance of being gentle to prevent shearing of the genomic DNA, but I find that people tend to be too gentle.
Another common problem is that the lysis is allowed to proceed for too long, resulting in permanently denatured, undigestable DNA.
Here’s are some tips for improving the lysis and neutralization steps and increasing your plasmid yield.
- Using a low copy number plasmid? Use double the recommended volumes of resuspension, lysis and neutralization buffers. This might also help for high copy plasmids that have given low yields or poor lysis in the past.
- After adding the lysis buffer, instead of the 4-6 inversions recommended in the protocols, gently mix by inverting the tube continuously for 3 minutes, then immediately add the neutralization buffer.
- Mix the neutralization buffer by gently inverting continuously for 1 minute.
- If the precipitate looks like desiccated coconut, then things are looking good. If it looks gloopy, this is bad. Try to break up the gloop by mixing, this time a little more vigorously (but still quite gently) for a further 1 minute.
- If the glop still does not break up, then the yield is likely to be poor. Next time use double buffer volumes as described above.
8. Isopropanol Quality
Many labs have isopropanol in large containers that have been opened and closed over the course of a year. For the best result in the precipitation step, make sure the isopropanol used is not the old bottom-of-the-barrel stuff.
Use some isopropanol from a new bottle or a smaller bottle that is not who-knows how many years old. This makes a huge difference in the size of the DNA pellet you obtain after centrifugation and, therefore, your plasmid yield. To find out more about how precipitation works, and the differences between ethanol and isopropanol, read our article on DNA Precipitation: Ethanol vs. Isopropanol.
9. Losing the Pellet
Isopropanol pellets are glassy and clear, and difficult to see. The best practice is to mark the side of the tube where you expect the pellet to form after centrifugation in a fixed angle rotor so when you decant the isopropanol; you know where to look for it.
Another way to ensure you know where your pellet is when using a fixed angle rotor is to load your tubes in an identical way (relative to the center of the centrifuge), then your pellet should always be in the same place.
Keep an eye on the spot and look for the glassy material. Sometimes this is difficult because many people use the Oakridge plastic tubes which are opaque. If you have glass corex tubes, this is a nice alternative and they can be baked to make them pyrogen-free.
Sometimes, if you have concerns about losing the pellet, it is good practice to pour the isopropanol supernatant into a 15 ml tube to save it, just in case the pellet slipped off the wall. But this does not normally happen as long as you do not let the sample sit for long after the centrifuge stops. Once it is done, be right there to decant the sample. The only times I have seen a pellet come loose from the wall is when I was late getting to the centrifuge and it sat still for a few minutes.
Whether you use Oakridge tubes or glass, just note where that pellet should be. Once you wash with 70% ethanol, the pellet becomes visible. When you are ready to resuspend your pellet, you’ll know exactly where to find it because you marked the tube.
Caution! It is not always a pellet!
Sometimes with fixed angle rotors, the DNA may not always form a nice tight pellet at the sidewall. It can sometimes smear down the side. For this reason, I always use my resuspension buffer to wash down the side of the wall above my pellet to make sure I solubilize every molecule of plasmid that may be present even though I can’t see it.
If you have appropriate adaptors, you can use a centrifuge with a swing bucket rotor to entire your pellet is at the bottom of the tube, rather than on the side. To find out more about how rotor choice affects pellet placement, watch the webinar on centrifugation basics from Eppendorf.
It is a shame to do all that work and then lose the DNA pellet right at the end! More tips on perfect DNA pellet recovery are found here too.
I thought it would be good to mention that many plasmid kit manufacturers have recognized that the pelleting step is problematic for some users so have developed kits that desalt the DNA using “precipitators” or silica disc filters. These are a fast alternative to centrifugation. However, you still need good isopropanol for these to work so always use fresh.
10. Centrifugation is Too Short or Too Slow
We had a nice discussion about DNA precipitation in a previous article and it was the consensus that the most important factor in obtaining high yields is centrifugation speed and time. Don’t cut the centrifuge time short unless you can turn up the speed.
11. Columns Can Get Blocked or DNA is Not Fully Eluted
If you are using centrifugation to remove the precipitated debris, filter the supernatant through Whatman paper before applying it to the column since small amounts of precipitate could easily block the column.
After elution, DNA can remain on columns. To capture any remaining DNA perform a second elution into a separate collection. Using elution buffer heated to 50°C can also help to increase elution yield.
Plasmid Yield Summarized
Plasmid DNA preps have a lot of steps where things can go wrong but in my experience, the problem is usually either the culture or the DNA precipitation. If you are experiencing low yield in your plasmid preps there are steps you can take.
To check if your culture is healthy for larger-scale preps, just take 1-2 ml out of your flask and then do a quick miniprep on it to see how much plasmid/ml is there. That will give you a good idea of what you will get from the rest of the sample.
So remember to get great plasmid yields, do a little background first on your vector and insert to make sure there is no reason for the DNA itself to be a problem, and then start with a fresh colony and starter culture and fresh antibiotic. And at the end, fresh isopropanol will be key to the thorough precipitation of all the plasmid DNA.
Originally published May 12, 2014. Reviewed and updated March 2022. Content in this article includes contributions from Vicki Doronina and Nick Oswald.
References
- Maniatis, T., Fritsch, E. F. and Sambrook, J. Molecular cloning. New York: Cold Spring Harbor Laboratory; 1982. pp 545.
- Begbie S. et al. (2005) The Effects of Sub-Inhibitory Levels of Chloramphenicol on pBR322 Plasmid Copy Number in Escherichia coli DH5?. Journal of Experimental Microbiology and Immunology (JEMI). 7:82-8.
It looks like pMAL is ampicillin resistant. You can use chloramphenicol (another antibiotic) amplification. You can read a bit about it here (https://bitesizebio.com/22824/how-to-manipulate-plasmid-copy-number/) and there’s a link out to more resources in that article.
How do you go about getting appreciable yields from low-copy plasmids like the pMal series from NEB?