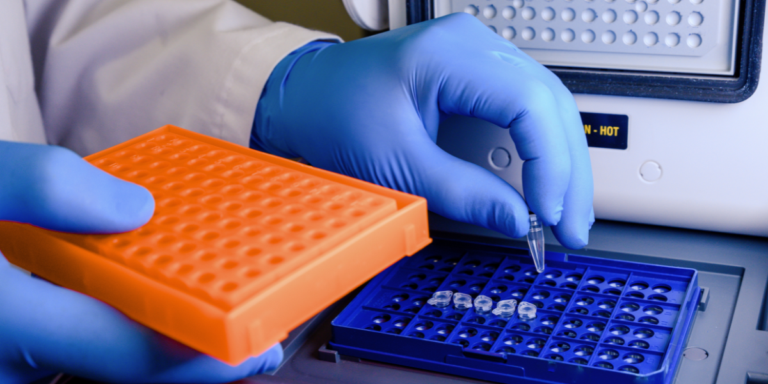
qPCR primer design is the process of selecting or creating a primer pair that will specifically amplify your target in a quantitative PCR assay. If you’re looking to design qPCR primers, we’ll talk you through the five stages of this process:
A primer set cannot be rescued downstream from a skipped upstream decision. If you are looking to troubleshoot your current qPCR experiment, check out our guide for fixing common qPCR failures.
Stage 1: Before you design, does a validated primer set already exist?
This stage costs nothing and can save you days! Because qPCR is one of the most widely used techniques in molecular biology, validated primer sets already exist for many well-studied targets, especially in human and mouse.
Reusing a validated set means inheriting an assay that has already been tested at the bench, and it often comes with the assay conditions you’ll need to replicate the work, e.g., enzyme kit, instrument, primer, and probe concentrations.
Choose a free resource to help you move forward
DIGITAL TOOL
qPCR Helper Pack
EBOOK
The Fundamentals of qPCR and RT-qPCR
There are two routes to find them:
- The first is the published literature: any paper that ran qPCR on the same gene in the same genus or species will often report the primer sequences alongside the conditions used to run them, sparing you the work you would otherwise have to do yourself.
- The second is manufacturer-maintained assay portals: major qPCR suppliers maintain searchable libraries of designed primer sets for SYBR Green and hydrolysis-probe assays, typically covering human, mouse, rat, and a range of additional species.
If your target or species has no validated set available, skip to Stage 2.
→ For a structured approach to pre-flight primer discovery, see our guide on what to check before you design qPCR primers.
Stage 2: Which detection chemistry are you committing to?
This stage is easy to defer but it’s also the most common sources of trouble downstream. Detection chemistry has to be committed before you specify primer parameters, because it determines what your primers need to do. qPCR detects amplification through one of two approaches:
1. DNA-binding dyes
These bind to any double-stranded DNA (dsDNA) in the reaction, including the target amplicon, primer dimers, and off-target products. They’re cheaper and technically simpler, but most instruments cannot distinguish the signal generated by your target from the signal generated by everything else in the tube. A melt curve run after amplification can help you identify whether non-specific products are present, but it diagnoses the problem after the fact rather than preventing it.
2. Probe-based chemistries
These take a different approach: the signal is gated to a sequence-specific molecular event involving fluorescence quenching, so only binding to the intended target produces a signal. The main probe families in use are hydrolysis probes (also called TaqMan), molecular beacons, Scorpion probes, and dual hybridization probes; each implements sequence-specificity through a different structural mechanism, so choose carefully.
How to choose
The practical decision comes down to three factors: target abundance, required specificity, and whether you need multiplex detection.
Probe-based chemistry is necessary for rare or weakly expressed targets, for any application where false positives are unacceptable. For all multiplex assays, SYBR cannot resolve multiple targets in a single reaction because it binds every amplicon indiscriminately. For single-target assays on abundant targets, SYBR can work well, provided you run a melt curve. Treat any Cq threshold you’ve heard as a rule of thumb rather than a rule — the exact cut-off shifts with your sample type, reference gene, and tolerance for false positives.
Whatever you choose here, you carry that commitment into Stage 3. A probe-based assay adds constraints that a SYBR assay does not.
→ For a full comparison of probe chemistries and the decision framework for choosing between them, see our guide on how to choose the best qPCR probe for your experiment.
Stage 3: What are the design parameters for a working qPCR primer?
With detection chemistry committed, you can specify the primer pair via the four parameters listed below:
- Amplicon size: 70–200 bp. Amplicon length affects amplification efficiency directly. Shorter amplicons amplify more reliably, particularly from low-input or degraded samples where template integrity is compromised. For example, a 200 bp amplicon will fail on a poor-quality template, whereas a 90 bp amplicon could survive.
- Melting temperature (Tm): 60–63°C, ideally 60°C, with a maximum pair difference of 3°C. The Tm window exists because both primers in a pair need to anneal efficiently under the same cycling conditions. When the Tm of one primer substantially exceeds the other’s, the higher-Tm primer anneals more stably and primes preferentially, amplifying one strand more than the other and producing uneven, inefficient amplification. Keeping the pair within 3°C of each other keeps them competing on roughly equal terms.
- GC content: 40–60%. This range optimizes product stability. Below 40%, the duplex between primer and template is weak, making it more prone to non-specific binding and early dissociation. Above 60%, GC-rich sequences promote secondary structure and hairpin formation within the primer, reducing the fraction of primer molecules available for productive annealing.
- 3′ end composition: C or G preferred. The 3′ end of the primer is where DNA polymerase initiates extension. Terminal T or A residues bind non-specifically to template DNA more readily than C or G, increasing the risk of mispriming and extension from the wrong position. Ending on a C or G provides a tighter, more specific anchor for extension to begin.
Across the whole primer sequence, avoid self-complementarity. A primer that can fold back on itself will form hairpin structures or primer-dimers. Both will reduce the concentration of primer available for productive annealing and drag down amplification efficiency.
These four parameters are your starting constraints, and design tools such as Primer-BLAST and Primer3 will generate candidate pairs against them. If you’re using a probe-based chemistry, additional constraints apply. Primers are inexpensive to synthesize, so testing two or three candidate pairs is a reasonable hedge against any single pair performing poorly.
These parameters apply equally whether you’re amplifying a gene from genomic DNA or from cDNA. When the target is an mRNA, a different kind of constraint (which Stage 3 cannot address alone) comes into play.
→ For the full parameter-setting workflow in Primer-BLAST and the primer selection process, see our step-by-step guide to designing qPCR primers.
Stage 4: Is your target mRNA? Why exon-exon junctions matter
If your target is an mRNA your primer pair needs to do something the parameters in Stage 3 cannot specify on their own: distinguish expressed transcript from contaminating genomic DNA.
RNA preparations are rarely completely free of contaminating gDNA from the source cells. If your primers amplify both cDNA and gDNA with equal efficiency, you cannot tell whether your signal is coming from an expressed transcript or from genomic contamination, and your Cq values will be wrong.
Exon-junction design
The standard design response is to place at least one primer so that it spans an exon-exon junction: half the primer’s sequence hybridizes to the 3′ end of one exon, and the other half to the 5′ end of the adjacent exon.
This works because the two exons are physically separated in genomic DNA by an intron. A primer designed to bridge that junction has no contiguous complement in the genomic sequence, so it cannot efficiently prime amplification from gDNA. However, it amplifies cDNA without issue, because the intron is absent in the mature mRNA template.
DNase treatment
Exon-junction design is not the only defense available. DNase treatment of the RNA prep before reverse transcription degrades contaminating gDNA before it can be amplified, and is commonly used alongside or instead of junction-spanning primers. The two approaches can also be combined.
One prior question needs to be resolved before you pick the junction: isoform
Many genes produce multiple mRNA isoforms through alternative splicing, and a primer that spans a particular junction will amplify only isoforms that retain both flanking exons. Decide which isoform or isoforms you want to detect before you commit to a junction position.
→ For the junction-design step in Primer-BLAST and the isoform selection workflow, see our step-by-step guide to designing qPCR primers.
Stage 5: Singleplex or multiplex? Why assay scope changes your primer design
The fifth stage asks whether your assay detects one target per reaction or multiple, looping back into everything upstream.
Multiplexing in qPCR means running several primer-and-probe combinations in a single reaction, each probe carrying a distinct fluorophore so that different targets can be tracked in separate fluorescence channels simultaneously. Multiplexing conserves samples, reduces well-to-well variation, and becomes more cost-effective per sample once optimized.
But the design constraints are substantially more demanding than for a singleplex assay. If those constraints aren’t met at the design stage, the results will be unreliable.
Multiplex requires probe-based chemistry
SYBR Green binds every double-stranded product in the reaction indiscriminately. When multiple amplicons are present, the dye cannot tell them apart, and the signal reflects total dsDNA accumulation rather than any individual target. Probes are the only way to assign signal to a specific sequence when more than one target is amplified in the same tube.
All primer pairs must have uniformly high amplification efficiencies
In a multiplex reaction, all primer sets share the same pool of polymerase, dNTPs, and magnesium. When one primer set amplifies more efficiently than the others, it consumes disproportionate resources — and the less-efficient assays are suppressed, first losing sensitivity and eventually dropping out entirely at lower template concentrations. Efficiency matching is therefore a core design requirement: differences that are negligible in singleplex compounds rapidly across cycles when multiple sets compete for the same reagents.
Primers must not cross-hybridize.
A primer from one assay that partially hybridizes to a target or primer from another assay in the same reaction will trigger primer-dimer amplification. Primer-dimers consume reagents and disproportionately suppress the assay whose primers were involved.
Fluorophores must be spectrally compatible with your instrument
Probes carrying fluorophores with overlapping emission spectra produce signal crosstalk between detection channels, which can generate false positives or compromise quantification. Fluorophore selection has to account for both spectral separation between dyes and the specific filter set and excitation source of the instrument you’re using.
Note: A useful performance check when validating a multiplex assay
Each primer-and-probe combination should produce the same Cq value in the multiplex as it does when running alone. If a target’s Cq shifts upward in the multiplex, it is being suppressed. Common causes include reagent competition from a more efficient or more abundant assay or primer interactions. That Cq drift is your signal to investigate and resolve through optimization before the assay can be trusted for quantification.
Beyond primer design, multiplex reactions require master mix formulations capable of sustaining multiple concurrent amplifications. If you’re adapting a singleplex mix, it will need supplementation. Wet-lab validation (e.g., efficiency testing, standard curves, sensitivity checks) comes after design and is outside the scope of the article, but can be found in our qPCR analysis guide here.
→ For the full treatment of multiplex setup, fluorophore selection, and optimization, see our guide to probe-based multiplexing qPCR. For multiplex probe selection, see our guide to choosing the best qPCR probe.
qPCR primer design: frequently asked questions
What makes a good qPCR primer?
A good qPCR primer pair gives you specific, efficient amplification of the target you’re measuring — and nothing else. Specificity comes from correct parameter selection: hitting the Tm window (60–63°C) with a closely matched pair, staying within 40–60% GC to avoid weak duplexes or secondary structure, ending on a C or G to reduce non-specific extension, and keeping the primer free of self-complementarity. Efficiency comes from amplicon length — shorter amplicons (70–200 bp) amplify more reliably, particularly when the template is limited or partially degraded. For mRNA targets, specificity also requires a primer that spans an exon-exon junction to exclude gDNA signal. And the whole set has to match the detection chemistry you’ve committed to — a primer set designed without knowing whether it will carry a probe is a primer set designed for the wrong problem.
What is the ideal Tm for qPCR primers?
60°C, within a working window of 60–63°C. Keep the Tm difference between the forward and reverse primer below 3°C — when one primer’s Tm substantially exceeds the other’s, it anneals preferentially and the amplification becomes asymmetric.
→ For the full parameter-setting workflow, see our step-by-step guide to designing qPCR primers.
How long should qPCR primers be?
Primer length is most usefully constrained by Tm (60–63°C) and GC content (40–60%) rather than by a fixed nucleotide count, because primers of different GC composition will hit the target Tm at different lengths. Most design tools enforce these constraints automatically and will return primers in an appropriate length range. Focus on hitting the Tm window with a matched pair rather than targeting a specific number of bases.
→ For the full parameter-setting workflow, see our step-by-step guide to designing qPCR primers.
What GC content is best for qPCR primers?
40–60%. Below this range, the primer-template duplex is weak and prone to non-specific binding. Above it, GC-rich sequences in the primer promote hairpin and secondary structure formation that reduces amplification efficiency. Most design tools will enforce the range if the parameter is set correctly.
→ For the full parameter-setting workflow, see our step-by-step guide to designing qPCR primers.
Do I need a probe for qPCR, or is SYBR Green enough?
It depends on three things: target abundance, required specificity, and whether you need to detect multiple targets in one reaction. SYBR Green binds any double-stranded DNA — it cannot confirm that the signal it reports corresponds to your intended target. For single-target assays on abundant, cleanly amplified targets, SYBR is workable provided you run a melt curve to verify specificity. For rare or weakly expressed targets, for applications where false positives are unacceptable, or for any multiplex assay, a probe is required. Any Cq threshold you’ve seen cited as the SYBR/probe boundary is a rule of thumb — the real threshold shifts with your sample, your reference, and your tolerance for ambiguity.
→ For a full comparison of detection chemistries, see our guide on qPCR probes.
Should qPCR primers span an exon-exon junction?
Yes, when your target is an mRNA. Junction-spanning primers work because the two exons they bridge are physically separated by an intron in the genomic sequence — the primer has no contiguous complement in gDNA and cannot efficiently amplify it. Primers that don’t span a junction will amplify both cDNA and any contaminating genomic DNA in the prep, making it impossible to attribute the signal confidently to the expressed transcript. DNase treatment of the RNA prep is an alternative or complementary approach.
→ For the junction-design step in primer design tools, see our step-by-step guide to designing qPCR primers.
You made it to the end—nice work! If you’re the kind of scientist who likes figuring things out without wasting half a day on trial and error, you’ll love our newsletter. Get 3 quick reads a week, packed with hard-won lab wisdom. Join FREE here.