Immunolabeling is the tried-and-true immunochemistry method of getting the stain you want onto the molecular target you want. Whether that target is contained within a large region of tissue (immunohistochemistry) or inside a single cell (immunocytochemistry), the ability to accurately label large numbers of samples will simplify your workflow and help you to achieve excellent data. Luckily, comparing samples side by side has never been easier. So, if your lab work is demanding more and more immunolabeling—especially with respect to cell culture—then it might be time to turn to chamber slide immunocytochemistry (ICC) to streamline your workflow all the way to the microscope.
What Is a Chamber Slide?
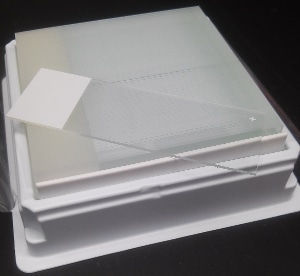
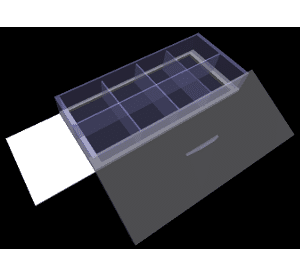
A chamber slide is like a miniaturized multi-well plate, built atop a standard glass slide (Figure 1). Its value lies within the permanently detachable reservoir; during incubation, individual chambers separate cell samples from the environment and each other. Inside these chambers, we can perform chemical reactions and immunolabeling. Once the lid and chambers have been detached, you can cover the slide and view it under any standard microscope!


Similar to multi-well plates, chamber slides are coated with a sticky chemical (e.g., poly-lysine) to keep adherent cells happily attached to and growing on the surface. A replaceable lid allows for gas exchange in the incubator and access to the cells when it’s time to feed them. Let’s have a look at a typical protocol for single slide immunostaining with chamber slides.
Single Slide Immunostaining with Chamber Slides
Step 1: Time Your Project to Coincide with a Fresh Split of Cells!
Take a ready-to-go cell aliquot from a labmate and seed your slides at 10%–25% confluency per chamber. This may not always be feasible as mutants and other select cell lines may hibernate away in the deep freeze. Using established cell lines dramatically reduces the time and effort it takes to go from cells to scope. But there is one important caveat! If you have to seed a new batch of cells, you may want to split and wash a couple of times to establish them first. Otherwise, you risk processing and staining a percentage of dead cells that were a casualty of the freeze/thaw cycle.
Step 2: Use a Manual Pipettor
Expect to use less reagents than with standard ICC. A lot less. In a single-chambered slide, you can use up to several milliliters of media, but you can get away with as little as 0.5 mL media in each compartment of an 8-chambered slide. A 1 mL pipettor provides greater manual control in this smaller workspace.
Step 3: Practice Sterile Technique
It should go without saying that all cell samples must be processed in an environment free from contaminants. In other words, use the tissue/culture hood, spray with ethanol and label with an ethanol-resistant pen. This is the best way to ensure experimental reproducibility. Otherwise, you may discover, frustratingly, that the culmination of your hard work is…a hair, a thread, or some other contaminant sandwiched between the sample and the coverslip.
Step 4: Include Control Samples
Whether you run multiple replicates on single-chambered or within multi-chambered slides, you should always reserve enough chambers for a positive and/or negative control. Here, you will see what the staining signal should look like for a known antibody and cell type, allowing you to compare your other treated samples more easily.
Step 5: Incubate in a Humidified CO2 Chamber
Grow the cells, aiming for about 75% confluency. Replace the media on a regular schedule (this will be dependent on your particular cell line; or generally about twice a week). While your mileage may vary based on the type of cell line chosen and its growth rate, you may be ready to proceed with transfection, selection, or direct immunostaining in just a few weeks after growing the culture!
Step 6: Aspirate the Media, Wash, and Fix
Next, halt all cellular functions in their tracks, crosslink and denature proteins while keeping the cell’s structure intact. Formalin fixation in PBS is one way to do this. It’s a familiar reagent if transitioning over from immunohistochemistry, but it can affect epitopes, hiding them from exposure to your primary antibody.
Step 7: Hide and Seek – Antigen retrieval
When there’s “no visible signal” under the scope and you believe that there should be, your protocol might benefit from an added heat- or enzyme-mediated incubation step. This will help to roll back the effects of crosslinking, and thus exposing epitopes that may have been previously hidden during fixation. An alternative is to forgo formalin fixation in favor of an organic solvent like methanol.
Step 8: ABC… Immunochemistry!
Immunochemical methods vary from lab to lab, but the heart of this technique remains the same. Briefly, after the cells have been fixed you will permeabilize them with Triton X-100 and block in serum. This allows the primary and secondary antibody to enter the cell. The primary antibody will bind to an epitope; the secondary antibody will bind to the primary antibody. If your secondary antibody contains an enzymatic reporter (e.g., HRP, DAB), the corresponding chemical reaction will reveal a colored signal. When using fluorophores, you can look forward to seeing colorful fluorescent signals under the microscope.
Step 9: Snap, Seal, Stage!
Once staining is complete, carefully snap the chamber off, cover accordingly and proceed to the microscope for analysis and digital photography.
Step 10: A Note About Fluorophores
Always work with fluorescently labeled samples in a darkened laboratory because repeated exposure to light washes out your signal. Preserve your data by taking digital photographs as soon as possible.
When working with new antibodies and fluorophores, you must start out with a few essential controls. First, omit the primary and secondary antibody to determine if your sample fluoresces automatically. Second, omit the primary antibody to see whether or not there is nonspecific binding of your fluorescent secondary antibody.
Happy immunostaining!


