Immunohistochemistry (IHC) is a vital tool, not just at your wet bench but also in clinical labs the world over. IHC is used extensively in hospitals and veterinary practices in grading and studying cancers, and the results may determine what treatment a patient gets – including the controversial Herceptin!
But it’s also pretty useful in research. Got a protein you’re trying to locate in a tissue? PCRs and Western Blots looking a bit hazy? Want some pretty pictures for your thesis? Immunohistochemistry may be just the technique you’re looking for.
The Pros and Cons of IHC
The theory behind IHC is that we can use antibodies to bind to proteins in tissues, and by building up layers of secondary antibodies and coloured complexes, we can visualize the locations of these proteins with a simple light microscope. Sounds great, right? Well it’s not always straight-forward (honestly, I don’t think anything in my PhD ever was!) and as with any technique, IHC has benefits and drawbacks, some of which you can see in the table below.
Good | Bad |
You can visualize your protein within an organ and pinpoint it to certain cells – and sometimes even to certain parts of the cell, such as the plasma membrane or nucleus. | Antibodies are pretty varied when it comes to quality. There are often a plethora of antibodies available for the same target. Your goal is to pick the most specific one that is the most suited for IHC – not all antibodies serve the same purpose! |
It’s a relatively straightforward protocol (honestly it’s all washing and incubations!) | There’s no widely accepted scoring system for IHC... |
It doesn’t require any special equipment, so chances are you could do it in your lab right now. | …nor is there a general consensus as to what a “positive” stain is: your weak stain might be somebody else’s negative. |
It gives you some nice attractive data for your thesis – there are only so many blots your examiners can bear to look at! A pretty IHC is a welcome relief. | Initial set up costs (wash reagents and kits etc.) may be a little high, but once these things are in place the cost per stain works out to be pretty low. |
So you think IHC might be for you? Well I’m assuming you do if you’re still reading, so let’s crack on!
Put this article into practice
Choose a free resource to help you move forward

POSTER
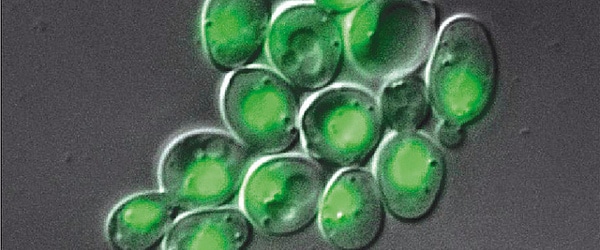
Fluorescent Proteins Guide

POSTER
Immunofluorescence Troubleshooting Guide
Read up!
Yes, I know it’s boring. I know its tedious trawling through pages and pages of PubMed results, and frustrating when that one stunningly perfect paper turns out to be from a journal your institution hasn’t subscribed to… but you have to do it. You could save yourself a heck of a lot of time, effort, blood, sweat and tears if you can find an experiment similar to yours to use as a starting point. A good paper will give the suppliers of all their materials, and sometimes (if you’re very, very nice) a group may send you an aliquot of their antibody for free if it’s one they’ve made themselves.
Sourcing your Materials
Next you need some tissue. I don’t mean like a box of Kleenex – you need an animal tissue of some description that you can experiment on. That doesn’t mean going out and laying traps either – I don’t want to be seeing news articles about an old woman whose cats have gone missing if this gets published. There are loads of tissues available online for research purposes: everything from mouse to monkey.
Decide which animal best suits your experiment. Remember you’re going to have to take into account what primary antibody you have and if it’ll work on a particular species.
Pick the type of tissue you will use. Tissues will often be either available as paraffin wax-embedded, or flash frozen. Personally I prefer the former as tissue structure is better preserved this way and they store easily at room temperature for a long time.
Find a primary antibody that is highly specific and suited to IHC. Often a manufacturer’s description will come with a list of what antibodies can be used for and at what concentration, so go with that as a starting point.
Pick your staining kit. You’ll also require some kind of a staining kit. This is basically a kit which contains a biotinylated secondary antibody (these are usually directed against mouse or rabbit primaries – and sometimes both!) and a streptavidin-peroxidase complex. “A what?” I hear you say. Keep calm… I’ll explain it a bit further on. These kits may come with some kind of visualizing reagent (usually DAB or AEC) called a chromagen or you may need to buy them separately.
Get everything together. You’ll also need some ethanol, hydrogen peroxide, BSA, haematoxylin, lots of 1x PBS and something called Histoclear – an organic solvent which smells like old oranges. Yummy.
Ok… Now What do I do?
So you’ve got all your reagents and antibodies. Time to get staining. There are lots of different protocols out there for different methods of staining. Here is a commonly used one called the streptavidin-peroxidase method. Feel free to change things wherever you feel you need to – you’re the scientist!
Prepare Your Slide
First things first – get the wax off your slide. Antibodies won’t stick to it otherwise. The easiest way to do this is to pass it through several washes of Histoclear and ethanol. In my lab we do:
1. 100% Histoclear 1: 4 minutes
2. 100% Histoclear 2: 4 minutes
3. 100% Histoclear 3: 4 minutes
4. 100% Ethanol: 4 minutes
5. 100% Ethanol: 4 minutes
6. 70% Ethanol: 4 minutes
Sounds repetitive, doesn’t it? Get used to it. It’s important to wash off any reagents that may possibly damage your antibodies as you go through the protocol, so next up is a 5 minute wash in distilled water, followed by a 5 minute wash in PBS.
Block Endogenous Signal
Next, you need to block any endogenous peroxide activity the tissue may have – it will react with our chromagen and give you background signal. Not cool.
Incubate your slide with 3% hydrogen peroxide for 10 minutes at room temperature, and then wash in distilled water and PBS again.
Incubate with Antibodies
Next comes your primary. You need to block any non-specific binding sites at this stage too, so dilute the primary in 1% BSA in PBS to an appropriate concentration, cover your tissue with it and leave to incubate either at room temperature for an hour or overnight in a cold room. Then, wash it again in water and PBS.
Now for the secondary. The best thing to do here is to follow the manufacturer’s instructions with regard to dilutions and incubation times. Again, wash in water and PBS, then do a similar incubation with your streptavidin-peroxidase reagent and wash again.
All these steps help amplify your signal.
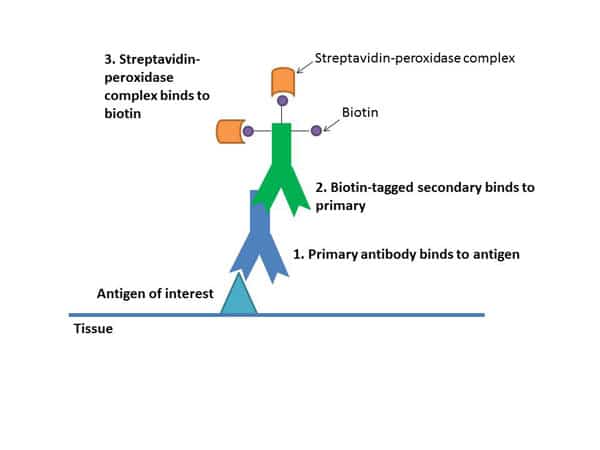
The secondary binds to your primary antibody, building up layers of antibodies. Each secondary is tagged with a number of biotin molecules, which have a high affinity for streptavidin. Multiple streptavidins get bound to each secondary, which amplifies the signal (see Figure 1). These streptavidins also have peroxidase enzymes conjugated to them, and it’s these enzymes that will help cause the color change with the chromagen.
See Your Results
Now you need to visualize where all these antibodies are. This is where the DAB chromagen comes in. The peroxidase enzymes you added earlier react with the DAB – without going into too much detail, it gets oxidized and forms a solid pigment which precipitates out of solution where the antibodies are (see Figure 2).

Make up the DAB solution according to what the manufacturer suggests and incubate your tissue with it. Keep an eye on it – the tissue can go brown in a matter of seconds or minutes… you don’t want to mess it up now! Once you think the tissue has reacted enough, dunk it straight into distilled water, and rinse it for 5 minutes to stop the reaction.
And Counterstain
You’ll want to counterstain your slide to resolve all the background tissue as simple unstained tissue is pretty hard to see under the ‘scope. To do so, submerge your slide in haematoxylin. How long you leave it in the haematoxylin will depend on which brand you use and how strong it is.
Now – and this is important – rinse the haematoxylin off for 5 minutes in TAP WATER… not distilled! I know this goes against everything you know as a scientist, but roll with it. The tap water is ever so slightly alkaline, which causes aluminium sulphate in haematoxylin to dissociate and form aluminium hydroxide – an insoluble salt which precipitates as a blue color onto your tissue.
Mount the Slides
You are nearly there! Now that your tissue is all stained up, you pass it back through the ethanol and Histoclear like we did earlier except in backwards order – start with the 70% ethanol and go back.
Finally, mount up your tissue with a mounting medium like DPX under a coverslip and leave to dry overnight. That’s it. Done!
Have fun looking at your slides!
Want to know more about histology and immunohistochemistry? Visit the Bitesize Bio Histology Hub for tips and trick for all your histology experiments.
Originally published on October 3, 2011. Updated and revised on July 7, 2016.
You made it to the end—nice work! If you’re the kind of scientist who likes figuring things out without wasting half a day on trial and error, you’ll love our newsletter. Get 3 quick reads a week, packed with hard-won lab wisdom. Join FREE here.

Put this article into practice
Choose a free resource to help you move forward
POSTER
Immunofluorescence Troubleshooting Guide

EBOOK
Guide to Special Stains for Histology