Every bio- scientist who wants to analyze DNA knows that the process begins with the extraction of DNA from cells of interest. These cells could be RBCs, parasites, or bacteria to name a few. Furthermore, there are various DNA extraction methods1 to choose from depending on sample type, downstream analysis, and so forth. Many scientists start with dried blood spots (DBS) and so how to extract DNA from such samples is of particular interest. A DBS is commonly prepared, by collecting blood onto a Whatman FTA card2 or Whatman chromatographic 3 mm filter paper, and letting it dry for a period of time (~4 hours) before processing. This method of bio-sampling has been used for decades.
A useful method for isolating DNA from such samples using BT Chelex 100 Resin3 is described below.
Step One: Erythrocyte Lysis
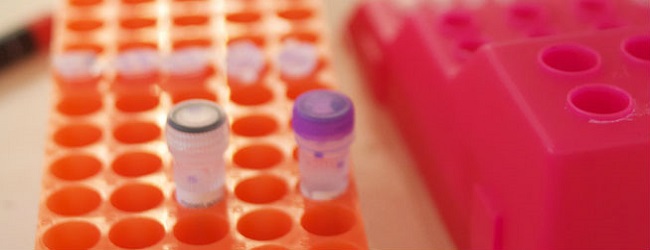
- Cut out a dry blood spot and place it into a microcentrifuge tube (1.5 ml) using a hole puncher. Don’t forget to label the tube, especially when working on multiple samples. For quality control purposes, also include a positive control blood spot.
- Add 1 ml of 0.5% saponin into the microcentrifuge tube containing the blood spot. Close, vortex, and incubate at 4 0C for at least 4 hours, or better yet, overnight. In this step, saponin complexes with cholesterol in the erythrocyte membrane leading to the formation of pores in the membrane and hence hemolysis.4 Saponin is a commonly used lysis reagent in freeing parasites (for example, malaria parasites) from red blood cells.
- Spin for a few seconds at 4,000 rpm, to remove drops from the inner lid, and aspirate the saponin from the tube using a non-barrier pipette tip attached to a pasteur pipette on a vacuum assembly machine. A plastic pasteur pipette can also be used. Leave the spot in the microcentrifuge tube.
Step Two: Washing
- Add 1 ml of phosphate buffered saline into the microcentrifuge, close, vortex, and incubate at 4 0C for 20-30 minutes. Incubating overnight will not cause any harm. This step ensures that saponin is removed from the tube.
- Spin for a few seconds at 4,000 rpm, and then remove the PBS, the same way you removed the saponin. Leave the spot in the microcentrifuge tube.
Step Three: DNA Extraction with Chelex Resin
Principle: Chelex resin works by preventing DNA degradation from degradative enzymes (DNases) and from potential contaminants that might inhibit downstream analyses. In general, the Chelex resin will trap such contaminants, leaving DNA in solution. The Chelex resin arrests cations such as Mg2+, an important co-factor for DNase action, hence protecting the DNA from degradation.5,6
- Pipette and add 150µL of 6.7% Chelex resin solution into the microcentrifuge tube containing the spot. Close the tube. An important reminder: when preparing the 6.7% Chelex solution, use water that is free from DNases, nucleases (or anything that might harm and degrade DNA).
- Incubate at 95 0C for 10 minutes using a heat block/ shaker. It is important to open the tube twice, every 2 minutes, to release pressure, and then shake for a few seconds thereafter. This releases DNA into solution.
Step Four: Avoid Chelex Resin Beads in Final Extract
- Spin for 5 minutes at 4,000 rpm
- Pipette as much extract as possible into a smaller microcentrifuge tube (0.6 ml) using an aerosol barrier tip while avoiding transfer of Chelex beads.
- Centrifuge the 0.6ml microcentrifuge at 4,000 rpm for 10 minutes. The idea of the second spin is to remove any remaining Chelex beads that might carry over into the final extract. Why is this important? Two main reasons: 1) Chelex binds to magnesium ions (essential co-factor for Taq polymerase used in PCR) and 2) Chelex fluoresces. If fluorescence is your way to visualize a result, this may create a false positive.
- Pipette approximately 100 µL and transfer the final extract to a new microcentrifuge. Label and store in a refrigerator.
A Few Tips While Doing DNA Extractions
- Work in a clean environment free of contaminants
- Use pipette tips that are free of nucleases
- Handle all samples with gloves
- Again, avoid Chelex beads in your final extract
Conclusion
Chelex resin7, provides a simple, and rapid DNA extraction method from DBS, for use in various molecular analytical applications. This method does not require expensive equipment and is reliable when tested against other methods.
References
- GE Healthcare (2010). Reliable Extraction of DNA from Whatman FTA Cards. Application Note 28-9822-22 AA. Buckinghmashire, UK: GE Healthcare.
- Whatman (n.d.). Preparing an FTA Disc for DNA Analysis. Whatman FTA Protocol BD08.
- Bio-Rad (n.d.) Chelex® 100 and Chelex 20 Chelating Ion Exchange Resin Instruction Manual. LIT200RevB. Hercules, CA: Bio-Rad Laboratories.
- Baumann, E., Stoya, G., Völkner, A., Richter, W., Lemke, C., and Linss, W. (2000). Hemolysis of human erythrocytes with saponin affects the membrane structure. Acta Histochemica, 102(1), 21-35.
- IBRC (2016). Extraction Protocol: Chelex. IBRC website. Retrieved from https://ibrc-bali.org/research/protocol/
- Kambara, C.S., Boissaye, R., Stewart, J., and Staton, P. (n.d.). Development and Internal Validation of a Chelex ® DNA Extraction Protocol for Reference Oral Swabs.
- Walsh, P.S., Metzger, D.A., and Higuchi,R. (2013). BioTechniques 30th Anniversary Gem Chelex 100 as a Medium for Simple Extraction of DNA for PCR-Based Typing from Forensic Material. Biotechniques, 54(3), 134-139.


