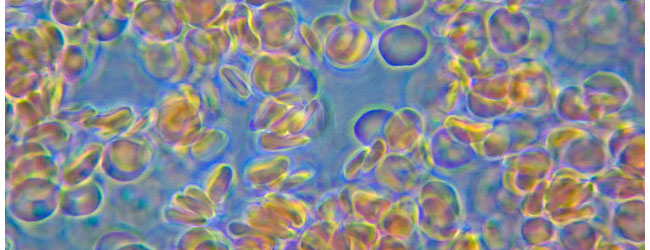
Formalin fixed paraffin embedded (FFPE) tissues are valuable samples that typically come from human specimens collected for examination of the histology of biopsies for the detection of cancer.
But each sample contains much more information just waiting to be unlocked. Despite the tiny sample size, DNA can be extracted from the tissue sections and used for a genetic analysis of the tumor and corresponding normal tissue to examine for changes in the patient’s genetic profile as well as for the detection of SNPs (single nucleotide polymorphisms).
But extracting DNA from FFPE samples can be tricky. So in this article I’ll give a brief overview of FFPE tissue samples and some tips to help you unlock their DNA.
Fixation of FFPE Tissue for Histology
As the name suggests, FFPE tissue is fixed in formaldehyde, which results in a variety of cross-linking effects to amino acids and prepares the sample for immunohistochemistry.1,2 Once fixed, the tissue is encased in a block of wax that can then be put into a microtome and cut into slices as little as 1-2 cell layers thick.
These sections are then stained, counterstained and examined for the absence or presence of abnormal or metastatic cells, providing valuable diagnostic information.
FFPE Tissues are a Valuable Resource
Current opinion is that there are over a billion FFPE tissue samples archived all over the world and with technologies such as next generation sequencing, researchers are ready to unlock many more secrets from these precious specimens, such as the genetic changes that led to rare cancers or samples from responders to chemotherapy vs. non-responders.
Isolating DNA from FFPE Tissues
One of the hurdles in isolating DNA from FFPE tissue is purification of DNA of sufficient molecular weight and quality for amplification and detection. The fixation process causes severe DNA damage and the formaldehyde cross-links result in PCR failure. And, the slice is small, normally 5-10 microns thick, so the amount of DNA retrieved is minute.
Getting DNA from FFPE tissues is a challenge, but is possible. Here are some tips to help you maximize your results:
1. If you are starting with a block and not a slice, trim some of the wax from the sides. This will help make it easier for the proteinase K to get in and digest the tissue and help reduce the number of deparaffinization steps if you are using that technique. This is not always possible with slices because they tend to be brittle or even have static and are difficult to manipulate.
2. Avoid techniques that use xylene to deparaffinize the tissue. The xylene treatment requires centrifugation steps that can result in loss of pieces of tissue with the wax as well as ethanol washes to remove the xylene that also results in extra handling of the sample and more loss. The less washing of your sample, the better. Examples of two commercial products that do not require xylene and instead directly melt the tissue are the BiOstic FFPE Tissue DNA Isolation Kit and the QuickExtract FFPE DNA Extraction Kit.
3. Check the DNA on a gel to determine the size range of fragments in the slice. To design a qPCR assay with the best sensitivity, it helps to know what size range the DNA is in the samples. This can vary based on the fixation time and age of the sample so some samples may have more degradation than others. Typical yields are 500 ng to 1μg of DNA per slice (depending on the tissue and the thickness of the slice) so if you combine a couple slices for each prep, you will have enough DNA to load 5-10 μl (from a 50 μl eluate) on a gel and see the size of the smear.
However, if you have a high throughput and gel checking each prep is not possible, then…
4. Design the qPCR assay to detect the smallest possible size. I used a human hydrolysis probe assay for GAPDH that was around 70 bp and I was able to achieve a Cq well within my standard curve instead of hovering right at the outer edge of detection. If the qPCR assay is greater than 200 bp, you may have a problem with detection sensitivity, again, depending on the source and quality of your samples.
5. Expect a difference in yield measurement when using the Nanodrop vs. picogreen. The Nanodrop will detect everything both single-stranded and double stranded and some of the DNA purified from FFPE samples will be denatured and single-stranded. The ssDNA will absorb more UV than the dsDNA3 so the Nanodrop reading is going to be much higher than using a dsDNA binding dye like picogreen. However, both ss and dsDNA is used as a template in qPCR so this is not a disadvantage. When comparing yields between different samples, the Nanodrop will give you a measure of the total nucleic acid purified and picogreen will give you a measurement of only part of the sample.
Summary
Isolating DNA from FFPE tissues is not as difficult as it once was thanks to the work of many researchers who needed to work with these samples and figured out how to extract and amplify DNA despite all of the damage it undergoes. Answers to many of our questions about the genetic changes in cancer are waiting to be discovered, one slice at a time.
Got any questions or more tips? Let us know in the comments.
References
- Fraenkel-Conrat H and Olcott H. (1948) Reaction of formaldehyde with proteins, VI: crosslinking of amino groups with phenol, imidazole, or indole groups. J Biol Chem. 174:827-843.
- Shi S-R, et al. Development of the antigen retrieval technique: philosophical and theoretical bases. In: Shi S-R, Gu J, Taylor C, eds. Antigen Retrieval Techniques: Immunohistochemistry & Molecular Morphology. Natick, MA: Eaton Publishing; 2000:17-40.
- Nielsen K, et al. (2008) Comparison of five DNA quantification methods. Forensic Science International: Genetics. 2(3): 226-230


