Want to save money on one of the most expensive steps of your Western blots? Then, use less antibody for significant cost savings!
You were probably taught that the best way to incubate your membrane was to soak it in 10-20 mL of an antibody solution on a shaker—enough volume to fill the container and completely cover the membrane. Then, you were told to pour that antibody solution down the drain. While this works, it also wastes a lot of antibody!
Choosing your method
The wet-chamber incubation method can be a lifesaver for a laboratory with a tight budget. It is my preferred choice due to its flexibility:
- it handles one or many membranes,
- can be used for short or long incubations and,
- is built from materials you find lying around in most labs.
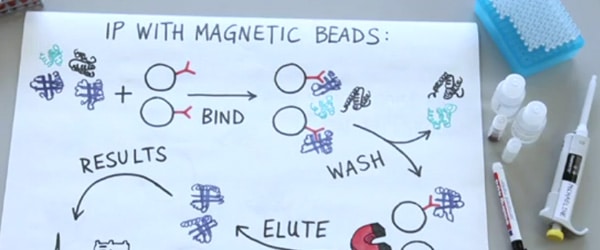
You can use the method I am about to describe, or try this other, similar method.
Enjoying this article? Get hard-won lab wisdom like this delivered to your inbox 3x a week.

Join over 65,000 fellow researchers saving time, reducing stress, and seeing their experiments succeed. Unsubscribe anytime.
Next issue goes out tomorrow; don’t miss it.
Set up your own wet chamber
The setup costs are close to nothing as all it requires is the following:
- A larger plastic box with a lid (the chamber)
- A small plastic box that fits inside the larger box (the stand)
- A glass or plastic plate that fits inside the chamber
- Parafilm
- Water
The larger plastic box serves as a sealed humidified chamber. Add enough water to cover the bottom but not too much as you may cause the stand to float.
Place the smaller plastic box (e.g., a pipet box) upside down inside the chamber to function as a stand for the plate.
Coat one side of the plate with parafilm; slightly stretch the parafilm, so it attaches nice and smoothly to the glass/plastic. Then, fold it onto the backside to hold it in place. If it is tight enough, you don’t need anything to hold it in place. If your plate is larger than the parafilm, attach several pieces of parafilm next to each other with a small overlap.
Place the parafilm-coated glass/plastic plate on the stand so the parafilm-side is face up.
The chamber is now ready for use.

Word of caution! Place your wet incubation chamber where you would like to perform your primary antibody incubation (lab bench/cold room) as it is tricky to move around later.
Using your wet chamber
Now, prepare your antibody solutions BUT only the volume needed to cover the membrane: if you are using mini-gels (8×6 cm) this will be up to 2 mL.
Place your membranes face-up on the parafilm-coated plate and gently distribute the antibody solution over the membrane. Note how the solution is contained on the membrane by the hydrophobic parafilm.
A pitfall to avoid: do not place membranes where two pieces of parafilm have been joined as the antibody solution can run in between. Remember, do not throw your labeled antibody-solution tubes away as you will recollect the solutions later!
Finally, when all your membranes are on the glass plate covered with antibody solution, close the lid to ensure that the chamber stays humid and that the antibody solution does not evaporate.
If you move the chamber around at this stage you risk run-off and mixing of the antibodies. That is why you place the chamber where you would like the incubation to take place before you place the membranes and the antibody solutions inside.
Incubate your secondary antibodies in the same way if you like, just rinse your parafilm-coated plate to get rid of the primary antibody.
Don’t stop saving antibody there!
If you want to save additional money, you can collect and save the used antibody. When the incubation is done, open the chamber and slightly tilt the plate. Collect the solution that accumulates at the bottom of the membrane and put it back in the labeled tube you made upon preparation. Place the solutions at -20°C until you need them for another blot.
Wet-chamber incubation is cheap, easy and effective. You will find that your vials of antibody suddenly last forever. It is hard for me to think of a reason why not to do your Westerns this way.
You made it to the end—nice work! If you’re the kind of scientist who likes figuring things out without wasting half a day on trial and error, you’ll love our newsletter. Get 3 quick reads a week, packed with hard-won lab wisdom. Join FREE here.