In Part I of AAV Production, I described how to produce crude (non-purified) AAV. In this article, I am going to tell you how to purify that crude prep.
Virus purification is usually done by gradient ultracentrifugation. Two common methods involve gradients made from increasing concentrations of cesium chloride or iodixanol. A cesium chloride prep contains less contaminating empty AAV particles, but iodixanol gradients are much less time consuming.
Here, I describe the iodixanol gradient method for virus purification using open-top ultracentrifuge tubes.
Virus Purification Using Iodixanol
In the iodixanol gradient method, each iodixanol fraction has a different function. The 60% layer acts as a cushion for the AAV, so the virus will sit between the 40% and 60% fractions. The 40% and 25% layers remove contaminants with lower densities than intact virions, such as empty capsids. The 1 M NaCl in the 15% layer reduces ionic interactions between free proteins, DNA and other macromolecules.
Materials
For virus purification you need:
- A T1270 ultracentrifuge rotor (Thermo Scientific)
- Thick-walled polycarbonate ultracentrifuge tubes (Seton Scientific)
- Iodixanol solutions to make your iodixanol gradient. Sigma-Aldrich sells iodixanol as ‘Optiprep’. See the paper ‘AAV-mediated gene targeting methods for human cells’ for the different iodixanol solution recipes.
First, prepare PBS-MK and NaCl/PBS-MK buffers.
- PBS-MK buffer: Dissolve 26.3 mg of MgCl2 and 14.91 mg of KCl in 1× PBS in a final volume of 100 mL. Sterilize by passing through a 0.22-μm filter and store at 4°C.
- NaCl/PBS-MK buffer: Dissolve 5.84 g of NaCl, 26.3 mg of MgCl2 and 14.91 mg of KCl in 1× PBS in a final volume of 100 mL. Sterilize by passing through a 0.22-μm filter and store at 4°C.
Then, prepare the individual iodixanol solutions:
- 15% Iodixanol solution: Mix 4.5 mL of 60% iodixanol and 13.5 mL of 1 M NaCl/PBS-MK
- 25% Iodixanol step: Mix 5 mL of 60% iodixanol, 7 mL of PBS-MK buffer and 30 ?l of Phenol red.
- 40% Iodixanol step: Mix 6.7 mL of 60% iodixanol and 3.3 mL of PBS-MK buffer.
- 60% Iodixanol step: Mix 10 mL of 60% iodixanol and 45 μL of phenol red.
TIP: I double the recommended amount of phenol red as it makes the gradients easier to distinguish.
TIP: Keep the iodixanol solutions in the fridge. While this isn’t strictly necessary, it makes them easier to load.
Procedure
To create your gradient:
- Pipette 1.5 mL of the 60% iodixanol solution (yellow) into the bottom of the tube.
- Pipette 1 mL of the 40% solution (clear) on top of the 60% layer. You will need steady hands to pipette slowly enough to do this. If you have a twist-top pipette, gently twist it down to 0.
- Repeat with 1 mL of the 25% and 15% layers, trying your best not to mix the solutions.
- Gently add your cell lysate (crude AAV) on top of the gradient. Weigh your tubes and make sure they are within 0.01 g of each other in weight.
- Spin at 65,000 rpm (about 385,000 x g) for 2 hours at 6°C.
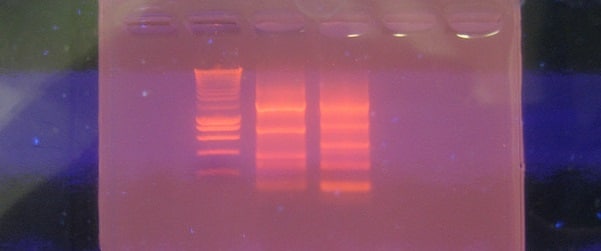
After the centrifugation step, you will still see the colored layers but not as clearly as before—the boundaries between layers will show some mixing.
TIP: Use freezing buffer to balance all your tubes within 0.01 g. If you have an odd number of samples, make a balance tube with iodixanol and freezing buffer.
Purify and Titer Your Virus
- Remove the top 2 mL of your gradient. This contains contaminating macromolecules. You will see the border of the 40% and 60% gradients fairly clearly—that’s where the AAV should be. Dip a pipette tip down through the gradient to remove 2 mL from this area.
TIP: If your transgene plasmid expresses a fluorescent protein, check towards the top of your gradient for a colored band. If you see one, remove it first using a sterile pipette tip—this means you won’t end up with free fluorescent protein contaminating your virus prep.
TIP: Check about halfway down the tube by holding the tube up to the light. If you see small white flecks, remove these contaminants using a 100 mL or 200 mL pipette tip so they don’t end up in your final virus prep.
Next, remove the iodixanol from your virus. One way to do this is to use a 100 kDa filter (Merck-Millipore sell these).
- Pre-wet the filter using 3.0 mL of AAV formulation buffer (20 mM Tris, 0.14 M NaCl and 0.001% pluronic F-68). Spin the filters at 4000 x g and discard the flow-through.
- Add 12.5 mL of formulation buffer into the top of the filter then add your 2 mL of iodixanol gradient solution. Invert the tube 8-10 times to mix.
TIP: Make sure the lid of the tube is tight before you invert it. No, really.
- Spin tubes at 4000 x g until the maximum volume of liquid has passed through the filter, leaving 100–300 mL in the top of the filter. This should take about 20-30 minutes.
- Add another 15 mL of formulation buffer, invert tubes 8-10 times then spin again for 20-30 minutes. Your virus should now be in a volume of 50-200 mL and ready to use.
- To titer your virus using fluorescence, transduce 293Ts using serial dilutions of your virus (for example, 1 mL, 0.1 mL, 0.01 mL, etc). in the presence of 4 mM etoposide. Etoposide is a topoisomerase inhibitor that increases AAV infection up to 50-fold. Higher concentrations of AAV will often kill the cells, so it’s important to do serial dilutions for an accurate titre.
- Etoposide is toxic to 293Ts so replace the media after 24 hours.
TIP: Different AAV serotypes infect cultured cells at different efficiencies, especially compared to in vivo infection. For example, AAV-8 infects cultured cells poorly but is very effective in the rodent CNS. For this reason, also titer by qPCR. To titer AAV by qPCR, dilute the prep 100-1000 fold. Use primers based on any sequence in your viral plasmid. It’s important to emphasize that no AAV qPCR is perfect. Different primer sequences can result in different calculated titers. The AAV ITRs may also affect qPCR titers by forming complex secondary structures.
TIP: Don’t worry if your fluorescent titers and qPCR titers are completely different. qPCR measures total virus particles in your prep, while fluorescent cell counts measure how well your particular AAV serotype infects 293Ts.
You can now use your purified AAV both in vitro or in vivo.