When I buy a new sweater, I love finding out that it goes with several pairs of pants, the scarf that’s an awkward color and the earrings I haven’t worn yet. PCR is like this sweater – it goes with almost everything and molecular biology is taking full advantage of this using it at every chance it gets.
Since PCR was first commercialized, dozens of variations have been created to suit the needs of scientists in a variety of disciplines.
Not too long ago, we looked at over 20 different types of PCR. This list is not at all exhaustive however, and another one has cropped up on our radar: Transfer-PCR, better known as TPCR to its friends.
What is transfer PCR
TPCR is a method of amplifying target DNA from a vector and integrating it into a destination vector – without using ligase. You can simultaneously introduce multiple targeted mutations throughout a protein-encoding gene without the time lag! Mmmm, tasty.
Enjoying this article? Get hard-won lab wisdom like this delivered to your inbox 3x a week.

Join over 65,000 fellow researchers saving time, reducing stress, and seeing their experiments succeed. Unsubscribe anytime.
Next issue goes out tomorrow; don’t miss it.
Erijman et al. ‘s TPCR stands out as a flexible, fast, and cheap ligase-independent platform for both recombinant DNA cloning and multiple-site targeted mutagenesis.
Since there are several ligase-independent cloning protocols out there, one has to ask, what makes TPCR any different?
- Both the amplification and the integration steps happen in a single tube
- You can clone your fragment into a position on the destination vector without a purification step to remove the intermediate PCR product.
Let’s take a look at what you will need to get started.
DNA Cloning: what is going on during all this?
Let’s break down what is actually happening by looking at the three steps in the protocol:
- The PCR amplification (Step 1)
- The intermediate stage (Step 2)
- The incorporation of your gene fragments into the destination vector (Step 3)
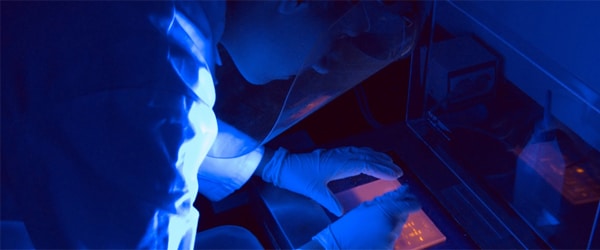
Step 1: Amplification
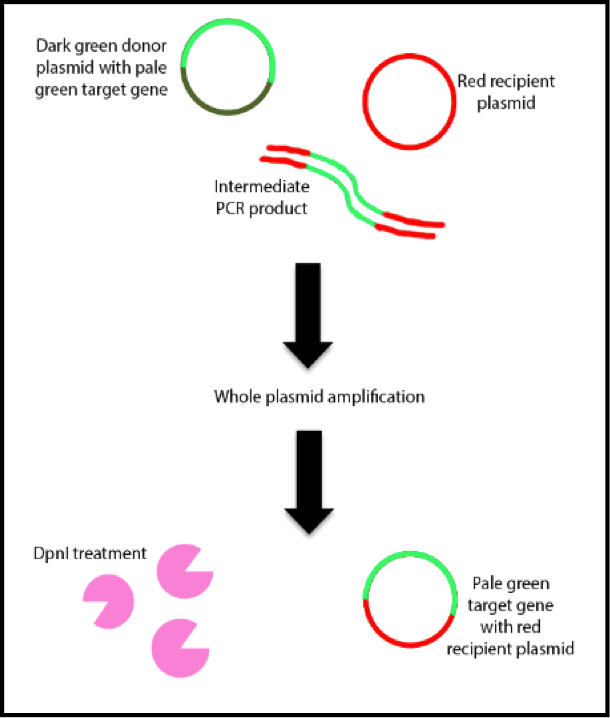
You add the donor (green) and destination (red) plasmids to a soup of primers, dNTPS, salts, pure water, and all your other usual PCR ingredients. The primers are complementary to the 3’ end of the target gene and the sequences corresponding to the integration site of the destination vector. Sequences corresponding to the integration site in the destination vector at the 5’ end should also be present in the primers. In the original paper two target genes of 500bp and 1300bp in length were used.
Step 2: Intermediate stage
Rather than purifying your reaction and removing the intermediate PCR products (red and green lines), the products serve as a mega-primer for incorporation into the destination vector in a linear amplification because of the complementary the 3’ ends. Since your target fragments do not have this complementarity, they cannot fulfill this function.
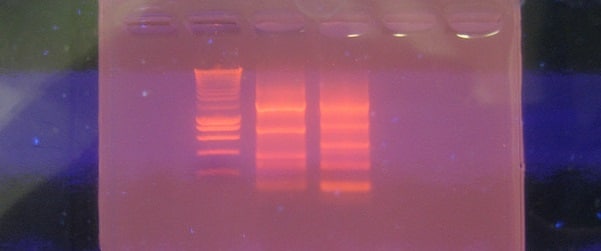
12 cycles of limited amplification are used to amplify the target gene. After that, we have a second PCR reaction of 20 steps that include longer elongation times to enable your megaprimers to be incorporated into the destination vector. Thhe efficiency with which this happens is mainly dictated by the concentration of primers used and may take some troubleshooting to get right but the general principle is that primer concentrations correlates with higher yields of intermediate PCR products and this is what we need to achieve. Unfortunately, when you have too high a concentration of primers, you get poorer incorporation of the insert gene into the destination vector so it’s a balancing act.
Step 3: Dinnertime
The recipient plasmid containing the target gene is digested by DpnI (pink pacmans) to remove the methylated donor plasmid. The reaction mixture is then transformed into E. coli cells to obtain the newly formed recombinant plasmid.
Colony PCR may be used to ensure you have the purest product you can get! If you really need reassuring, you can also use DNA sequencing.
Note: this same method can also be used for generating point mutations with a few small changes – see this article on site-directed mutagenesis for more information
Designing the primers

Changes for generating point mutations
TPCR works best for making combinatorial libraries of targeted mutants but you can also use it to make variant with specific multiple mutations throughout the target gene.
In Step 1, primers containing the desired mutations are used together. One of the distal primers located at either end must be in an opposite orientation. The products of Step 2 may be of various lengths and will not be a pure mixture of the mutated fragments you’re hoping for. The PCR products are incorporated into the donor plasmid by whole plasmid amplification to replace the wild-type sequences. Step 3 is identical to the above Step 3 but the final product is a combinatorial library composed of various combinations of mutated plasmids.
Very straightforward and convenient!
Have you tried TPCR yet?
Sources:
Erijman A, Dantes A, Bernheim R, Shifman JM, Peleg Y (2011) Transfer-PCR (TPCR): A highway for DNA cloning and protein engineering. J Struct Biol 175:171–177.
Erijman, A. et al. (2014) A single-tube assembly of DNA using the transfer-PCR (TPCR) platform. Methods Mol Biol 1116:89–101.
You made it to the end—nice work! If you’re the kind of scientist who likes figuring things out without wasting half a day on trial and error, you’ll love our newsletter. Get 3 quick reads a week, packed with hard-won lab wisdom. Join FREE here.