Do you know how to use a pH meter correctly? The pH meter might be the least understood and most abused piece of equipment in the lab.
Why such neglect?
Probably because the pH meter is an undercover agent from chemistry—and only a rare biologist likes chemistry.
A neglected pH meter means less reliable experiments, poor reproducibility, and your time wasted.
Let us, then, get past our prejudice and learn how to use a pH meter in 4 simple steps. We’ll also learn quite a bit about the design and function of pH meters.
How Does a pH Meter Work?
We can only do a half-baked job of looking after any piece of equipment unless we understand how it works. So how does a pH meter work?
They’re complicated, but you don’t need an engineer’s understanding of them to look after and use them. Check out the illustration below in Figure 1.
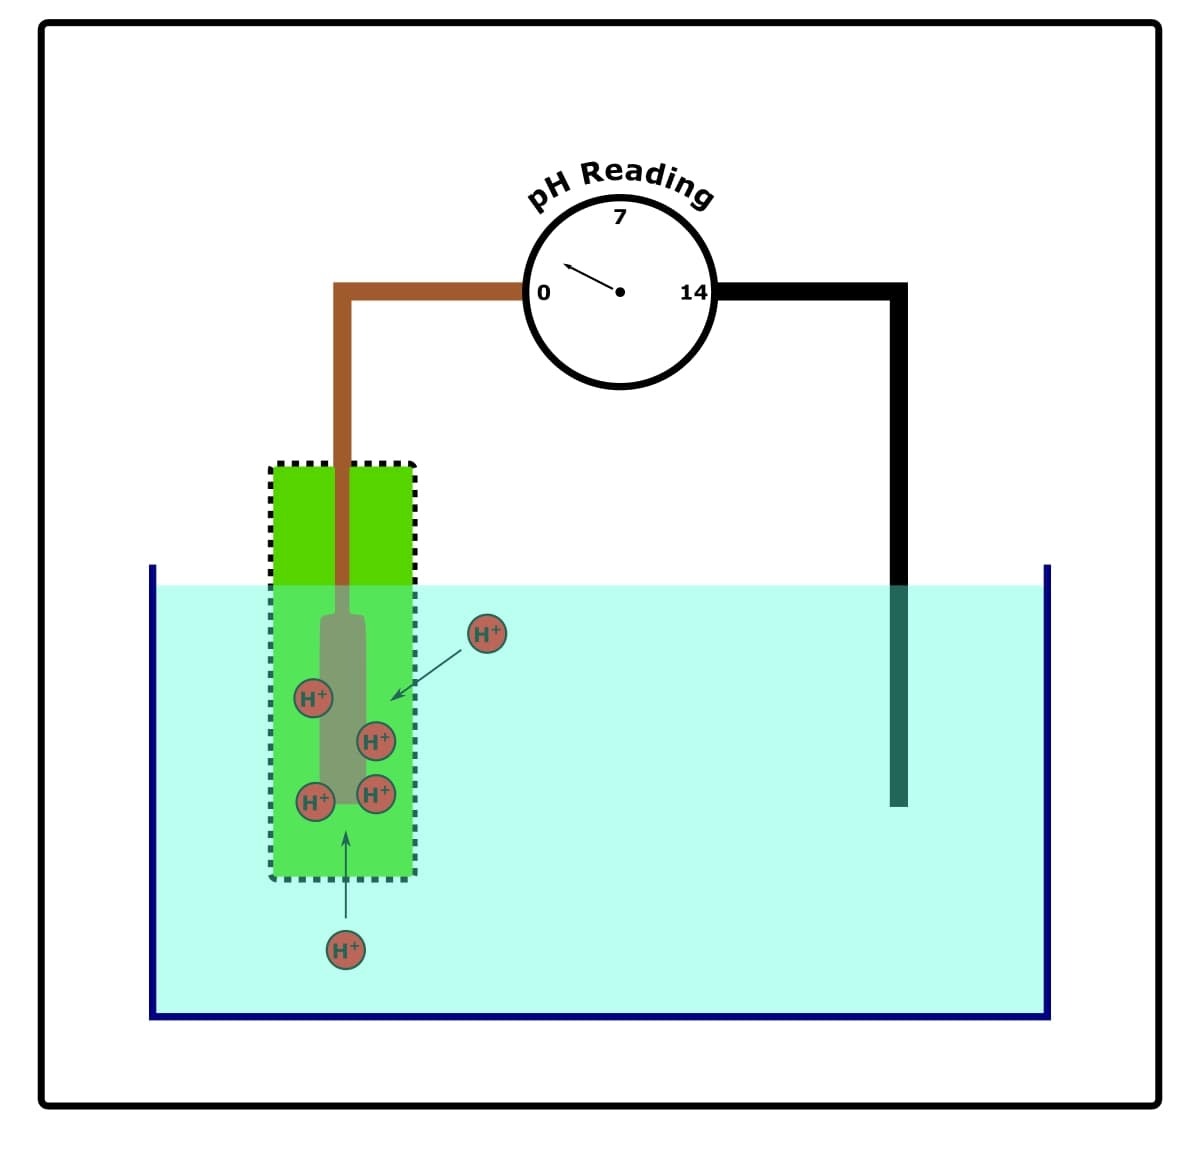
In a nutshell, the glass probe of the pH meter contains two electrodes:
- A reference electrode.
- A conductor electrode.
The reference electrode never comes into contact with our test solutions (unless the pH meter is of the single junction type—see later). It has a stable and constant electrical potential.
The conductor electrode is usually immersed in saturated (3M) potassium chloride. It does come into contact with our test solutions through a porous membrane in which it is housed.
Two more crucial points:
- The potassium chloride solution is conductive and has a neutral pH (7.0).
- The porous membrane is selective towards hydrogen ions.
When the conductor electrode is dipped into our test solution, ion exchange takes place through the porous membrane.
That is to say, because our test solution and the saturated potassium chloride have a different pH, and because the porous membrane permits the passage of hydrogen ions through it, hydrogen ions move to or from the test solution until equilibrium is achieved.
Remember, pH is a measure of hydrogen ion concentration.
This accumulation or vacation of hydrogen ions from the conductor electrode changes its chemical potential.
The chemical potential of the conductor electrode is measured and compared to the chemical potential of the reference electrode.
The difference in chemical potential between the two electrodes is called their potential difference.
And the potential difference can be converted to pH using the Nernst equation. (Thank goodness we don’t have to do this bit!)
Told you—complicated stuff!
So let’s move on to how to use a pH meter.
4 Steps For How To Use a pH Meter
1. Take Care of the pH Meter Probe
The pH meter probe should never dry out.
Should the probe dry out, it will break or at least become unreliable. I once had a run of unsuccessful yeast transformations because the pH meter was wrong by 0.2. Ouch!
You can refill the pH meter probe with saturated potassium chloride. But be sure to confirm that the pH meter still works by measuring the pH of several reference solutions that you know the pH of.
To prevent the solution inside the probe from leaking and/or evaporating, the probe should be stored in a solution of 3M potassium chloride (KCl).
It should not be stored in H2O, and especially not distilled H2O, because we need the conductive KCl solution. Dialyzing it all away is not good.
Tris Base and Proteins May Shorten the Lifespan of Your pH Meter
There are two types of pH meters:
- Single junction.
- Double junction.
Double junction versions are designed such that our test solution never comes into contact with the solution in which the reference electrode is immersed.
Key fact: the solution in which the reference electrode is immersed is silver chloride (AgCl), not KCl.
For single junction versions, this is not the case. Our test solution will come into contact with AgCl.
Another key fact: tris base reacts with silver cations (Ag+) to produce junction-blocking precipitates. So, in fact, do a lot of proteins.
A blocked junction means a poorly pH meter.
So, double-check what type of pH meter is in your lab before using it.
In short—don’t use single-junction pH meters with tris-based buffers or protein solutions.
2. Calibrate Your pH Meter Often
You calibrate the spectrophotometer each time you measure the optical density of a microbial culture by using a blank.
You calibrate a spectrophotometer before every measurement, in fact.
The same should be done with a pH meter.
Calibrating a pH meter is done using calibration solutions that have an accurately-known pH. The process should be performed every time you use the instrument or at least every morning the pH meter will be used.
The calibration solutions are usually pH 4.0, 7.0, and 10.0. You can even buy little calibration tablets that dissolve in a known volume of water to make the calibration solutions (Figure 2).
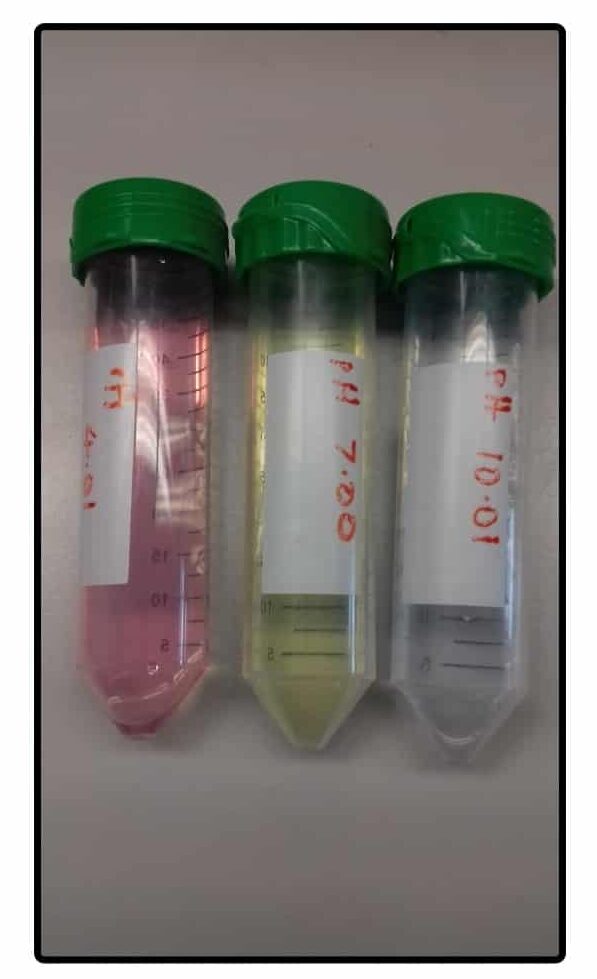
Calibrate the pH meter with at least two different solutions encompassing the final desired pH of your solutions. Better yet, calibrate it with all three!
3. How to Use a pH Meter Correctly
Since the probe should always be wet, when you pH a solution you have two choices:
- Keep the probe submerged in your solution during pH-ing.
- Take the probe out, wash it in deionized water, blot it with paper, put it in the storage solution, and wash again before putting it back into your solution.
The first choice is fine.
But.
Care must be taken while using a magnetic stirrer not to smash the probe. A medical student in our lab smashed a probe to pieces during their first day. Not an auspicious start.
4. Beware! Physical Chemistry Exists
Always pH your solutions at the temperature at which you intend to use them.
Why so?
Because pH is temperature-dependent. Furthermore, diluting strong acids into water is (usually) considerably exothermic. Your solution will usually warm up by a few degrees. This will change its pH.
And what did I just say? pH is temperature-dependent.
So, once your test solution cools, it will have a different pH than the one you measured. So be patient and allow it to cool (or actively cool it with some ice) before scribbling the pH value on the falcon tube.
Try not to use concentrated acids to pH your solutions—they tend to change the pH of most solutions suddenly. So suddenly that you can overshoot easily.
And we all love starting over again when we are already sweating in latex gloves and just want to go home.
Always add diluted acid to your test solution and not the other way around. Dilution of acids is strongly exothermic as already mentioned. Diluting the acid into your water-based solution, which is present in large excess, means there is plenty of water to soak up the heat that is liberated.
Adding drops of water to strong acid may generate enough heat to boil the water and spray it over you.
(Editor’s note: please always add everything to water.)
Physics Also Exists
Leave just enough spare volume for adding acid or base to your solution, unless you want to start all over again!
Help! What to Do When Crystals Form on the pH Meter
Those crystals are potassium chloride and they form when the potassium chloride solution evaporates.
It’s a common enough occurrence, so don’t panic. Here’s what to do:
- Gently scrape off any external crystals.
- Soak the probe in warm water to dissolve the crystals.
- Refill the probe with 3M KCl.
- Check the function of the probe by measuring the pH of calibration solutions.
There, that wasn’t so scary, was it?
How to Use a pH Meter in Summary
Hopefully, after reading this article, the inner workings of a pH meter are a little less of a black box to you. And you now have plenty of tips and tricks on how to use a pH meter correctly.
No excuses for letting it get all crusty now.
Even better—you are now equipped with some practical knowledge to pH your solutions like a pro!
Like what you’ve read? Have I missed some crucial points out? Let us know in the comments below. We do listen!
Originally published March 2013. Reviewed and republished, July 2022.
Further Reading
- pH Measurement Handbook. Thermo Scientific. Accessed June 2022