
An image is worth a thousand words.
Scanning Electron Microscopy (SEM) is one of the more popular imaging techniques in life science [1] because of the pretty and informative micrographs you get from it.
Like most experiments, however, your data (or in this case your image) is only as good as your sample.
In this article, we’ll cover 6 essential SEM sample prep points to maximize your chances of successful SEM imaging.
Choose a free resource to help you move forward
DOWNLOAD
Culture Contaminants Reference Card
POSTER
Histological Stains Poster
Need to take a step back? Read our ‘Applications of Electron Microscopy‘ article to learn more about how electron microscopy works and what it can be used for.
The Working Principles of SEM
Ever wondered how SEM works? Here are the very basics:
An electron gun at the top of the microscope directs a stream of electrons vertically down a set of electromagnetic lenses inside a vacuum chamber. Usually, one of the following electron guns is present in an SEM microscope:
- Thermionic guns: these use filament heating to to produce a stream of electrons.
- Field emission guns: these produce a strong electric field in order to eject electrons from their atoms.
The lenses are placed in a vacuum chamber in order to avoid obstruction and contamination by other particles. The lenses help direct the electrons towards the sample. Then, the electron imprint is converted to a three-dimensional image of the sample which is digitally constructed.
A Note on Conductivity and Sputter Coating
Samples for SEM need to be conductive. Or at least their surface does.
This is because non-conductive materials “collect” electrons on the surface. This build-up of charge leads to image artifacts.
So, metal samples require no additional preparation due to their inherent ability to conduct electricity.
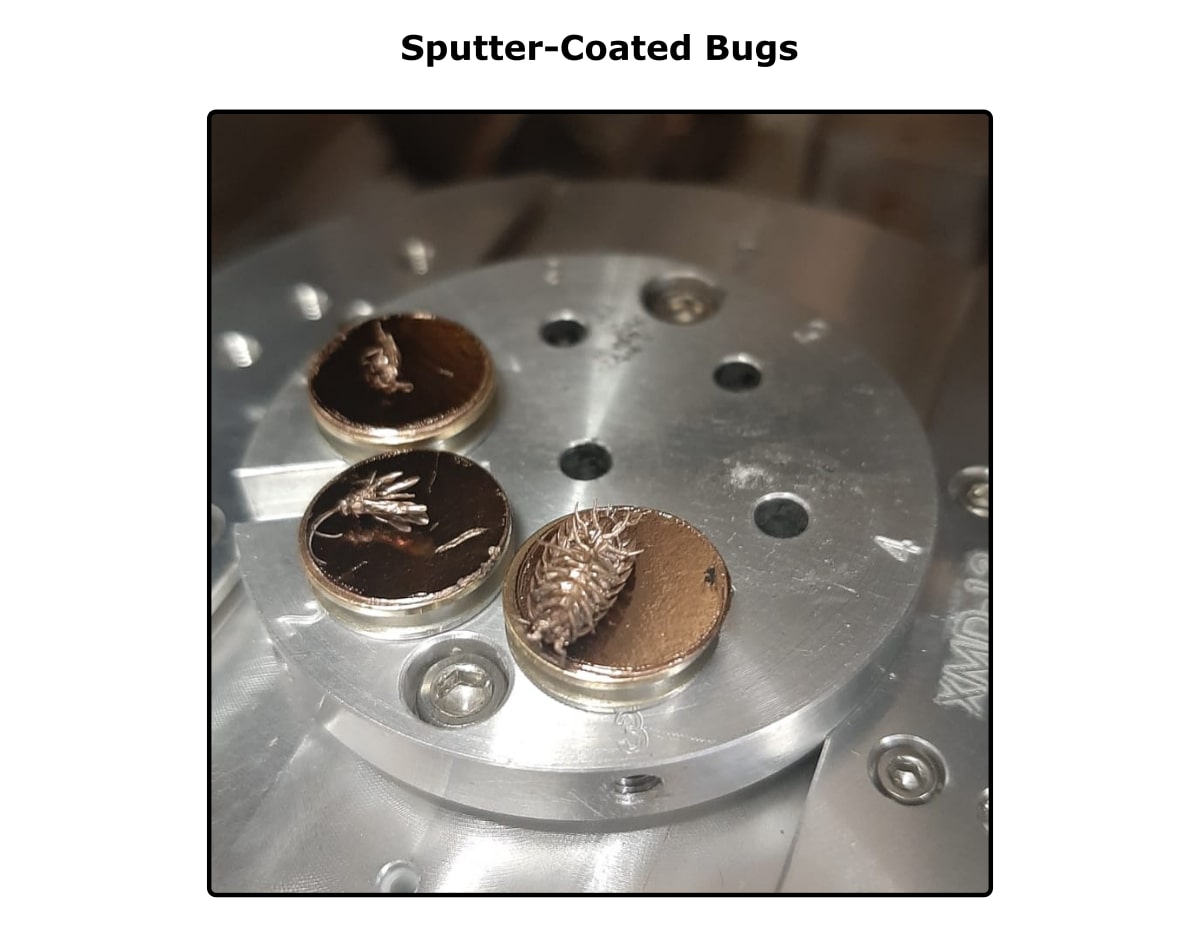
Non-metal samples, however, need to be coated with a conductive material during SEM sample prep to make them compatible with SEM. Usually, a thin layer of gold works fine. Deposition of conductive material onto the sample is performed using an instrument called a sputter coater. Check out Figure 1 below for an example.
With all that out of the way, let’s get on with the SEM sample preparation.
SEM Sample Prep: 6 Pointers
For scanning electron microscopy, you need to consider the sample’s size, shape, state, and conductive properties prior to imaging.
Ideally, the smallest representative sample size is the one to use. The microscope’s detection capacity is as much as 1 \(\mu\)m from the sample surface. So, consider all the following:
1. Sample Cleaning
A clean sample is essential for image clarity. For biological samples, use appropriate buffers or distilled water for cleaning the samples. Use a surfactant if the sample requires more vigorous cleaning.
If the biological property of the sample is known, you might be able to use proteolytic enzyme cleaning. To remove oils on the sample surface, wash with appropriate solvents. Additionally, you can use ultrasonic baths for cleaning the sample.
Be careful as ultrasonic baths are quite aggressive and may physically harm your sample.
2. Sample Fixation and Dehydration
Use a fixative like glutaraldehyde or osmium vapor to maintain the structural details of the sample.
Note: if a fixative uses a phosphate-based buffer for its preparation, salt deposits may interfere with the sample’s image quality.
For dehydration, use a graded series of alcohol and finish off the final dehydration step with 100% alcohol or acetone.
3. Drying
Prior to placing the sample in a high vacuum environment, it must be totally dry. Otherwise, water vaporization will obstruct the electron beam and reduce the clarity of the micrograph.
When using biological samples, be careful with your critical point drying (CPD), so as to not compromise the structural integrity of the sample. A suitable CPD instrument can help achieve this.
Alternatively, you can try using freeze-drying. Freeze-drying causes the least amount of sample shrinkage in comparison to air drying or CPD. However, freeze-drying carries the risk of ice crystal formation on the sample.
4. Sample Preparation of Tissue Sections
To observe details from tissue sections, remove the epoxy resin using organic solvents, ion beam etching, or plasma etching. You can also break the sample in the appropriate direction to reveal its internal details.
5. Sample Stubs, Adhesives, and Mounting Approach
Sample stubs or supports are available in different diameters, making them convenient for imaging different kinds of samples. Be sure the stubs are clean and handle the sample with clean forceps.
Also, use gloves during the entire sample preparation stage. The material you use as an adhesive to glue the sample to the stub should be non-toxic and should not tumble into the sides of the sample.
Conductive, double-coated carbon tape is the most common sample mounting adhesive. You need to ensure that a conducting path exists as you mount the sample.
This is because, to generate a micrograph, the electrons need to pass through your sample and mounting apparatus (the whole setup is grounded/earthed).
So, if the sample requires a conductive coating, be sure to mount it before coating so that both the sample and plug receive the coating.
6. Sample Storage
Store the sample and stubs in a dry, clean environment. Use clean forceps and gloves whenever you handle the stubs.
Wrapping Up
I hope that, after reading this article, you have a feel for what’s important in SEM sample prep to get successful images like the one below.

Happy imaging!
Got any great SEM sample prep tips of your own? Leave them in the comments below if so. We’ve already updated the article based on them, so they are useful.
Originally published April 2017. Reviewed and updated December 2021.
Reference
- Golding C, Lamboo L, and Beniac D et al. (2016) The scanning electron microscope in microbiology and diagnosis of infectious disease. Sci Rep 6:26516
Hear from some of the leaders in electron microscopy discuss their careers and work in The Microscopists podcast:
You made it to the end—nice work! If you’re the kind of scientist who likes figuring things out without wasting half a day on trial and error, you’ll love our newsletter. Get 3 quick reads a week, packed with hard-won lab wisdom. Join FREE here.


 - An Introduction 6")

