Have you ever been shown how to use a microscope properly? Or do you just dive right onto the microscope with little or no training and scant knowledge of the basics, then twiddle knobs, snap photos and expect the publication-quality images to appear? If it’s the latter you are certainly not alone! If only there were a place where you could get yourself up on the basics so that you actually have a clue what you are doing when you approach your ‘scope, and set yourself up to get images of the quality that your carefully executed experiments deserve. Well, actually, there are several of these places! Bitesize Bio is one of course (which is why you’re here), but another is the Leica Science Lab. It is packed with a wealth of information and expertise on all areas of microscopy. To help you on your quest for the perfect picture we’ve highlighted some of their fantastic resources – concentrating for this article on those covering fluorescence microscopy.
Begin at the beginning: Understanding the basics of your microscope
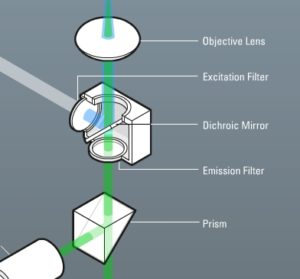
The first step for any microscopist is to is learn – I mean properly learn – how your microscope works. To start you on your way, Science Lab’s Step by Step Guide to Fluorescence Microscopy is really useful.
It is an easy to follow, interactive tutorial that takes you on a component-by-component tour of the inner workings of a fluorescence microscope, which should leave you feeling confident about what is actually going on inside your microscope.
Next steps: Understanding fluorescence microscopy dyes
Now you know how your ‘scope works you’re on your way to that perfect pic. The next critical step is to pick the right dye for your experiment; but with so many choices this can seem like a daunting task. Whether you want to image DNA, organelles, individual proteins or even visualize ions such as sodium and magnesium, the Fluorescent Dyes article in the Science Lab can help. It delves into the different dyes available and includes a handy, comprehensive list of fluorescent dyes and their individual emission and excitation wavelengths. So your know-how will be up to scratch in no time.
Diving deeper: Choosing and using fluorescent proteins
But dyes are of course not the only option; if you want to study your protein in live cells then dyes and antibodies, which require permeabilization of your cells, are of little use. In this case you need to dive into the world of fluorescent proteins. There are several important issues that you need to be aware of when choosing your fluorescent protein such as whether or not they have a propensity to dimerize or even oligomerize, which can affect the way your tagged protein behaves. In Fluorescent Proteins – Introduction and Photo Spectral Characteristics, you are given a wealth of information on the different proteins available including their disadvantages and various uses; for those considering FRET this includes examples of good donor/acceptor pairs. As with the article on fluorescent dyes, this article provides a useful chart that not only details the excitation and emission spectra for each protein, but also provides additional information such as their molecular weight, brightness and photostability. For those interested learning about how fluorescent proteins were discovered Leica Microsystems provide’s a wonderful piece on the history of fluorescent proteins, which covers the discovery of GFP and its use in live-cell imaging . It even covers how, by generating mutants of GFP, the colorful spectrum of fluorescent proteins was created.
How many microscopists does it take to change a mercury bulb?
Those who are already using microscopes should know that if your microscope using a mercury lamp, this will need replacing approximately every 300 hours, and that using bulbs for longer than this increases the likelihood of it exploding.
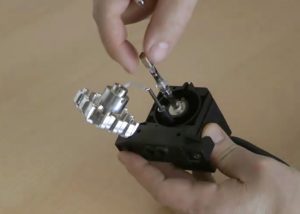
Yet do you know how to correctly change the bulb when this limit is exceeded? If not you’re in luck as the Science Lab provides a video tutorial showing how to safely replace the bulb. And as a bonus they also show you how to realign the new bulb in a second video tutorial. So how many microscopists does it take to change a mercury bulb? One: You, if you’ve watched the tutorial. This is only a snapshot of the resources available on the Science Lab. For those of you wanting to learn move advanced techniques the Science Lab also provides information on FRAP, FRET and FLIM as well as a range of articles on other aspects of microscopy. You can take a look at the whole Science Lab here. Leica Microsystems is also involved in educating Life Scientists about the fundamentals of Microscopy here on Bitesize Bio. Check out this Bitesize Bio webinar on the Fundamentals of Fluorescence Microscopy, which was supported by Leica Microsystems.


