Top Tips for Yeast Microscopy
Microscopy is one of the fun parts of working with yeast. If you fix your cells, you can get a snapshot of the structures. Live cells microscopy using fluorescent proteins tagged proteins is even better, as you can see the dynamics and cell machinery working before your own eyes.
Light Microscopy to Check for Contamination
The first thing yeast microscopy can be used for is a quick check with a simplest light microscope is whether your yeast culture is contaminated. You don’t even need oil, just spot some cells on a glass slide. At magnification x 20 yeast cells are round, immobile and if they are from a growing culture… budding. However, if among your yeast cell-zeppelins you see small bright dots, especially moving around, commiseration, your culture has bacterial contamination.
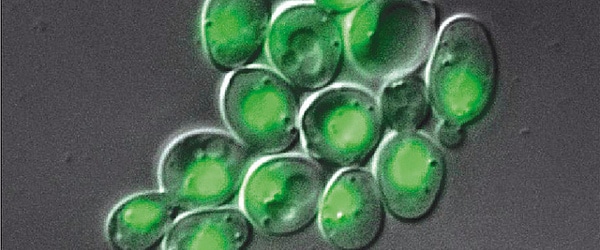
Yeast Fluorescent Microscopy
There are a few issues that you need to be aware of when using yeast for fluorescence microscopy:
Autofluoresence from Media
Rich media such a YPD is great for growing yeast, however if you are interested in flurorescent imaging this media isn’t a friend. This is because it has a high level of autofluorescence which will interfere with the signal from fluorescent proteins such as GFP and mCherry. Therefore, you should avid this media for samples that you want to visualise with fluorescence and instead switch to an alternative media such as SDC (synthetic defined complete media). If you must grow your yeast in a rich media, then ensure you switch it out to a less rich media like SDC at least a hour before you wish to image them.
Autofluorescence in ade- strains
Many of the laboratory strains have mutation in adenine pathway (ade-) meaning that they are unable to synthesis adenine themselves. However, in the absence of exogenous adenine they still try to synthesis adenine resulting in the generation of phosphoribosylaminoimidazole, an intermediate in the adenine pathway that fluoresces in response to blue light and will interfere with your GFP signal. There is not much adenine in YPD and there may not be enough in the synthetic defined media you are using. Therefore, if you are working with ade- strains ensure that you supplement your media with extra adenine to prevent accumulation of this fluorescent intermediate. Ideally, if possible you should just avoid the use of ade- strains as even excess adenine is not necessary sufficient to completely prevent autofluorescence.
Cells, which grow in these media accumulate fluorescent adenine pathway with high autofluorescence intermediate in the vacuole, and this will interfere with your microscopy. A simple solution is to add additional adenine to your media prior to growing cells. Alternatively, buy media with additional adenine in them such as “SC + 40 mg/ml adenine”.
Importance of Actively Growing Cells
Growing yeast cells for microscopy is easy, but you need to remember that you have to use actively growing culture; otherwise, many of your cells will be dead and useless. Depending on your experiment, you can grow yeast in complete defined or complex media (YPD).
Here are a Few Extra Tips to Remember when Preparing Your Yeast for Imaging
- Remember, that washing cells with water instead of saline can influence osmotic balance of the cells and change intracellular dynamics. Also, spinning cells at 13K, while 2.5K is enough to sediment yeast cells, may damage cytoskeleton.
- Poly-lysine most commonly used to attach cells to the microscopy slides. Coated slides are much more expensive than bought polylysine solution and its application takes just a minute (plus ten minutes for drying out and then you can keep them at room temperature for a month).
- Seal your slides with some nail polish.
- Because yeast cells are about 10 times smaller than human cells, yeast microscopy is fiddly.
- You need two things to start your yeast cell biology experiments – a microscope with x 100 objective and some immersion oil.
- All the dyes, which bind to various human cells structures, for example – FM4-64 for plasma membrane staining – work for yeast cells as well. But because yeast cells are smaller, you will most likely need longer exposures, sometimes of several seconds, to get an acceptable quality picture.
- For the same reason it’s better to start focusing on the cells with bright field focusing and then move to the specific filters to prevent excess exposure and potential loss of signal.
Resources for Yeast Microscopy
- There are specific tools you can use, such as yeast collection of ORFs fused with GFP.
- Non-profit plasmid collection Addgene has a variety of tools for usage in yeast microscopy.
Literature:
Weissman et al. (ed.) (2010) Guide to Yeast Genetics: Functional Genomics, Proteomics and Other Systems Analysis, Volume 470, Second Edition (Methods in Enzymology). ISBN-13: 978-0123751713 (2002 edition of this classic book is useful as well).
1 Comments
Leave a Comment
You must be logged in to post a comment.
Very helpful article! One note: I think the SC supplemented with adenine should be SC+40mg/L, not mg/mL.